Chapter 3
The back office and workspaces
· Published by Osentio
Screen tour
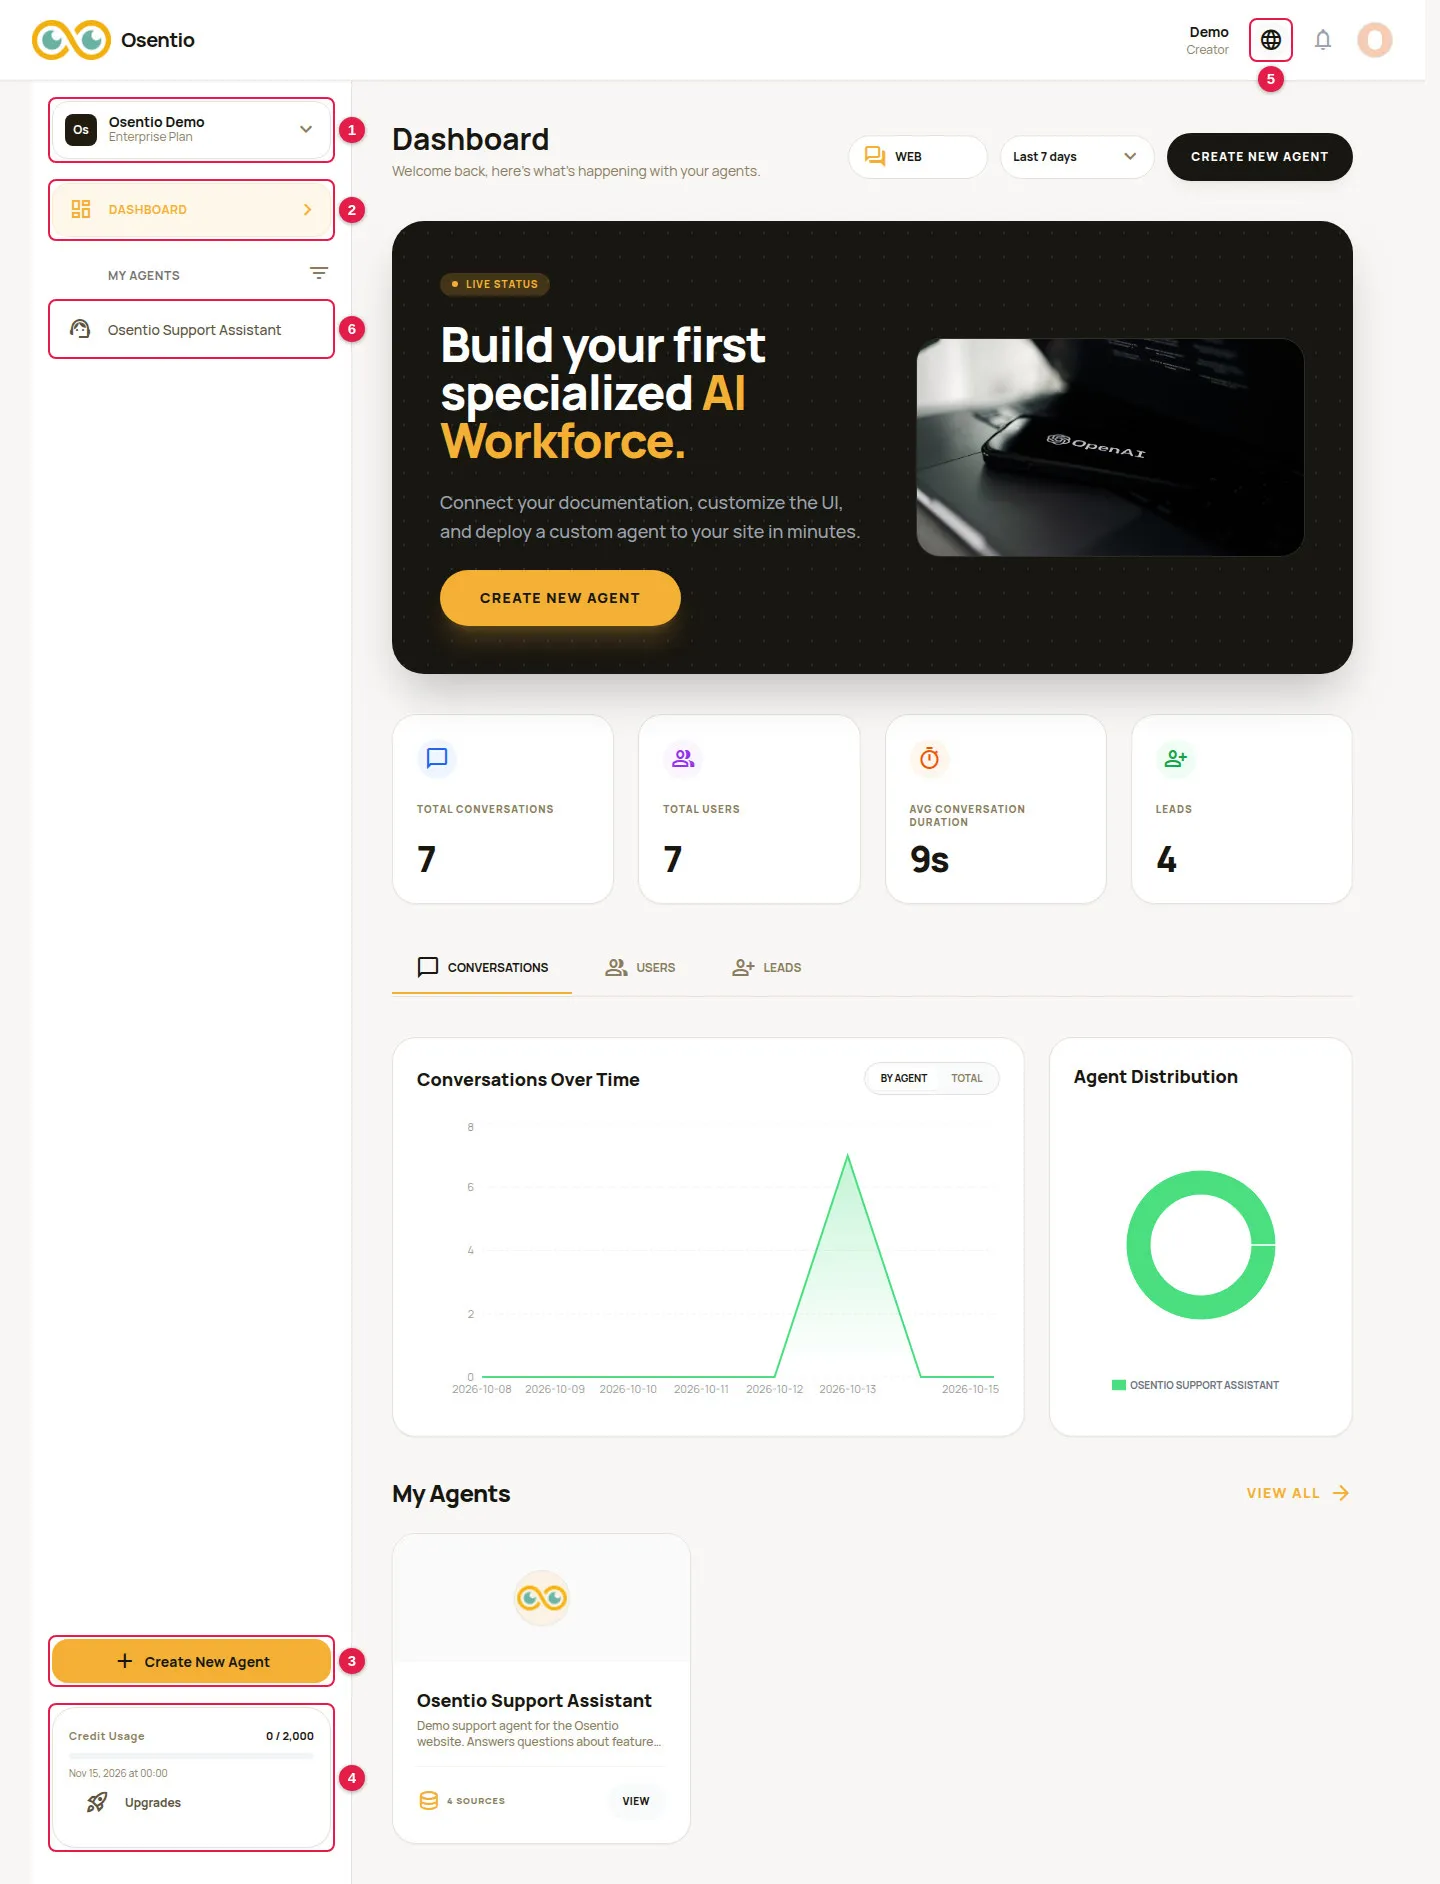
| No. | Area | What it is for |
|---|---|---|
| 1 | Workspace menu | Shows the current workspace and plan. Switch, create or manage workspaces here. |
| 2 | Dashboard | Returns to the overview of all your agents' results. |
| 3 | Create New Agent | Starts creating a new AI agent. |
| 4 | Credit Usage | Credits used and available in this period, and the link to upgrade your plan. |
| 5 | Language | Switches the interface between English and Traditional Chinese. |
| 6 | My Agents | Your agents. Click a name to open that agent. Before you have any agent, the middle of the screen shows a New AI Agent button and agent type templates instead. |
After you select an agent, seven tabs appear at the top: Activities, Analytics, Training Data, Actions, Test Agent, Deploy and Agent Settings. Chapters 5 to 12 of this manual cover them one by one.
Switching and creating workspaces
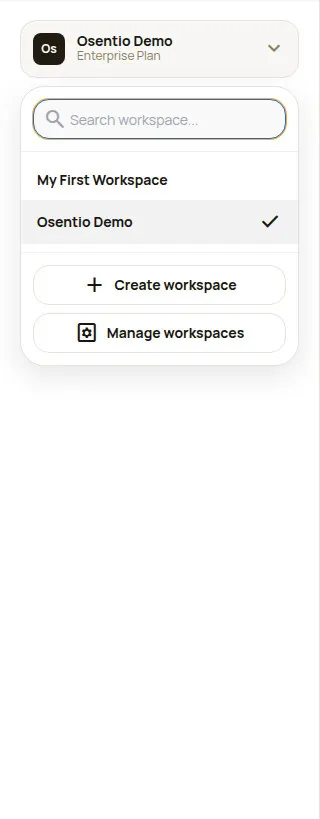
- Click the workspace menu at the top left. It lists the workspaces you belong to; click a name to switch.
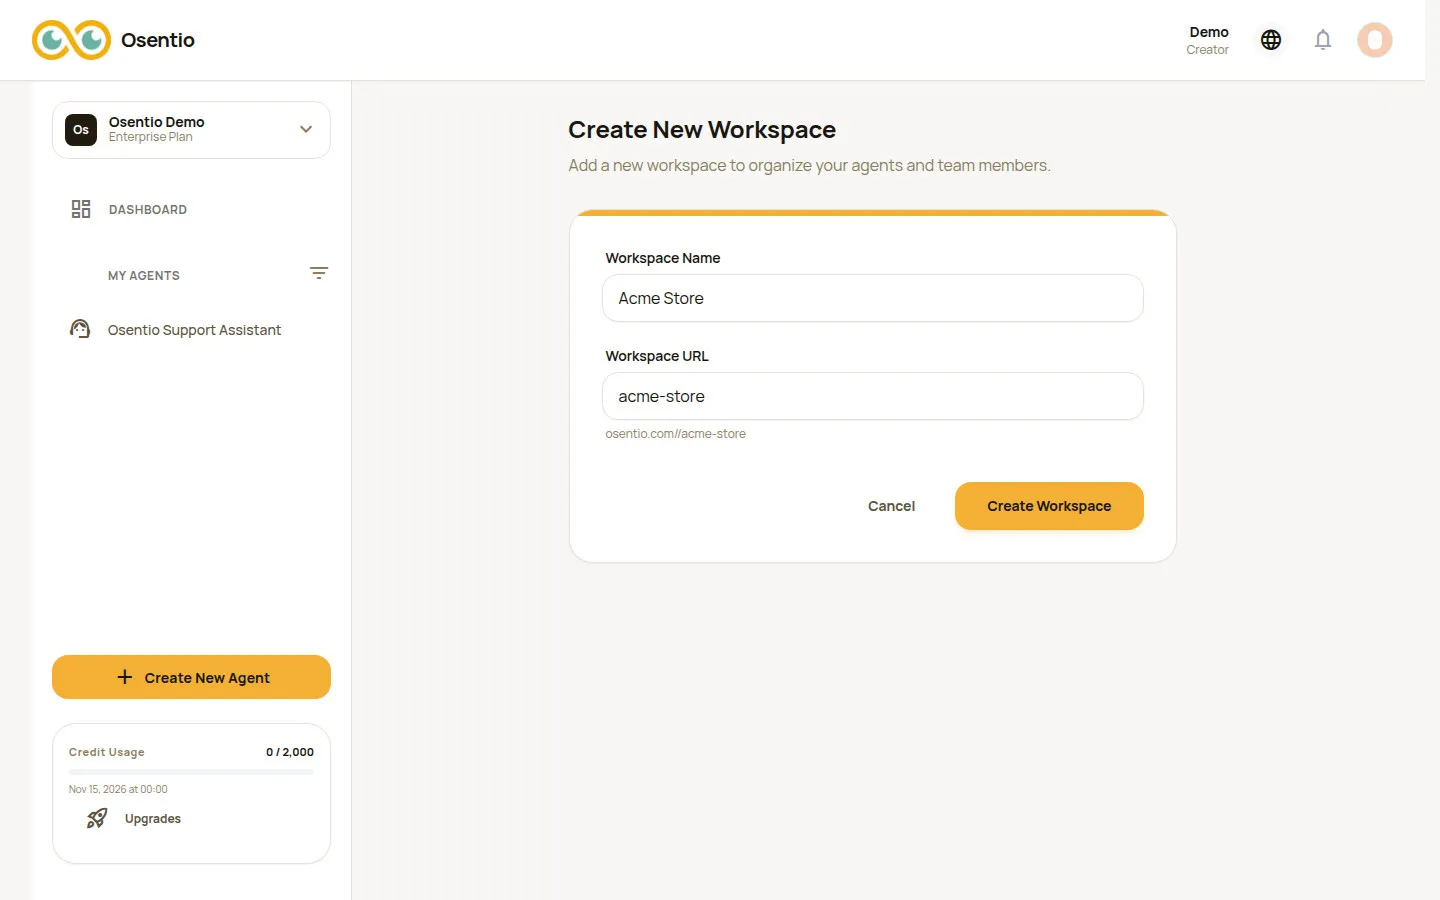
- To add one, click Create Workspace, enter a workspace name and URL, then click Create Workspace. The URL is generated from the name and must not be used by another workspace.
Managing workspaces
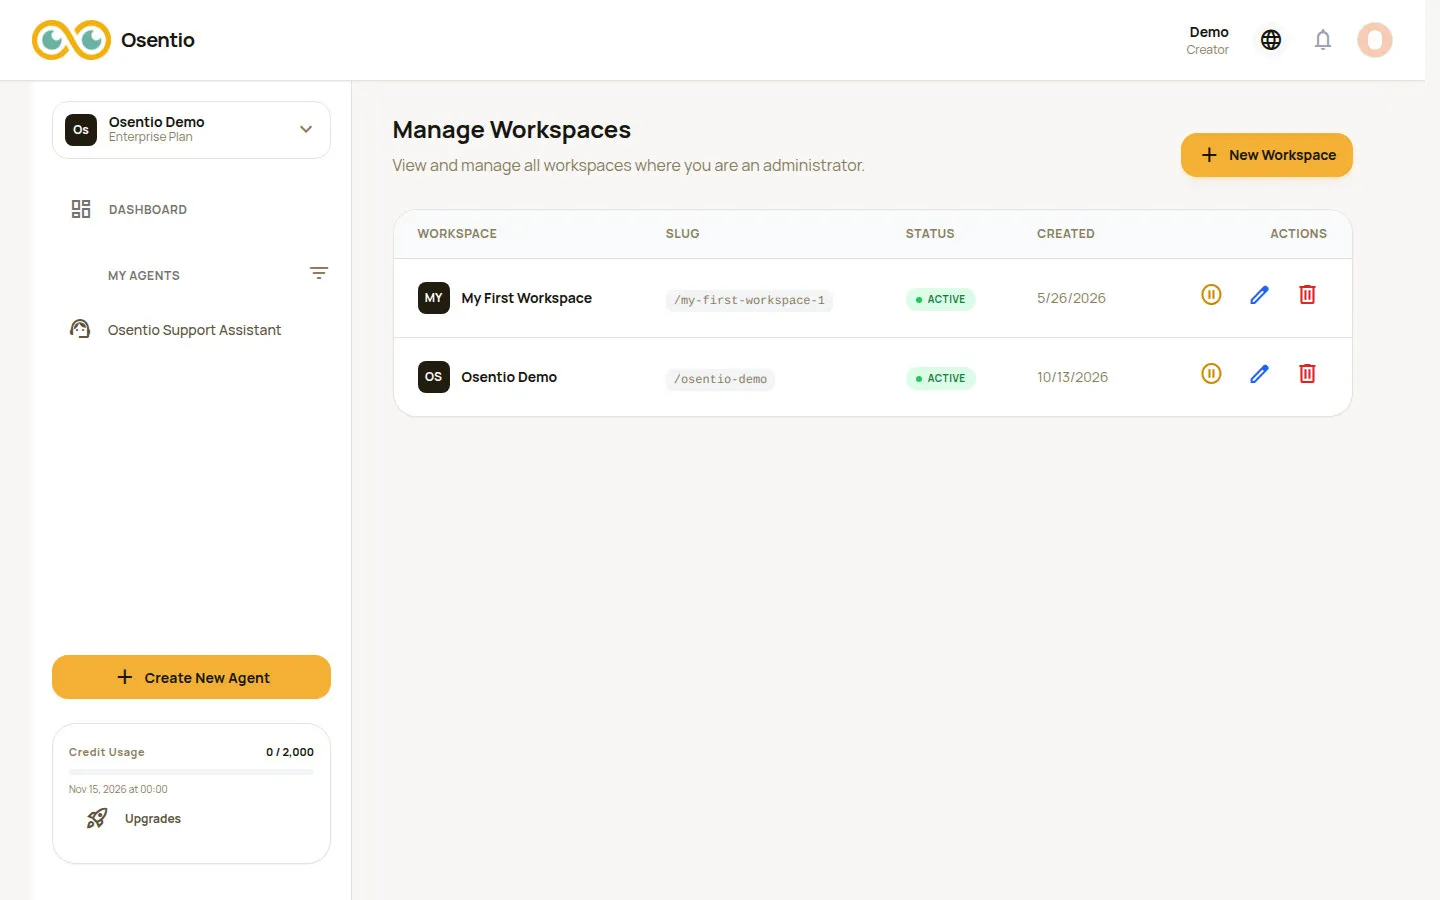
Click Manage Workspaces in the workspace menu. Each workspace has three actions:
- Deactivate / Activate: a deactivated workspace is hidden from editors.
- Edit: change the workspace name.
- Delete: not possible while the workspace still has agents. Delete its agents first.
TipThe number of workspaces depends on your plan (Pro 3, Enterprise 5). When the limit is reached, the New Workspace button is disabled.